Intro
Whonix is a tool for routing traffic through Tor. Whonix VM's come as Desktop/with UI or CLI. They provide two types of VM's, one is gateway and one is workstation. Whonix gateway can be used to route traffic through tor when you attach other VM's to it.
In this post, I'm just setting up Whonix Gateway CLI so I can route my VMs through tor while I'm reaching malware or threats.
This set up may not always be ideal for research as some C2's, phishing kits, and OSINT research sites may block tor exit nodes.
Warning: This method isn't officially supported by Whonix and I can't guarantee this is 100% safe and won't leak anything or won't allow an attacker to escape the whonix network or fingerprint you. Do your threat modeling and risk assessment for what you're planning to research or allow to execute in VM's. Follow official Whonix guidelines if you don't know what you're doing or don't feel comfortable doing this.
Proxmox Network Preparation
We need to create a new Linux Bridge/virtual network for Whonix so VM's can communicate with Whonix Gateway.
In proxmox host network settings, add a new Linux Bridge
Click "Apply Configuration" at the top to finish creating the bridge.
fyi: you may see vmbr1 if you don't have another bridge set up already.
Creating a VM
We need to create a VM to run to run Whonix Gateway in. We'll create the VM first then import the Whonix Gateway VMDK into it.
Loading the Whonix Gateway disk
Download Whonix CLI OVA file from here: https://www.whonix.org/wiki/VirtualBox#CLI
SCP the file to Proxmox.
Use tar to extract the OVA file, which will give you VMDK files.
Use qm import command to import the disk to your VM
The whonix-gateway-cli VM I created earlier has the id of 100. My storage is local-lvm (it's default proxmox storage).
Once the Importing is done and you get the message of successful import, run qm rescan.
Feel free to remove the extracted files and ova file.
Modifying the Whonix Gateway VM again
Now we need to enable the disk and change our boot settings.
Go to Whonix-gateway-cli VM and Hardware tab and double click on "Unused disk 0" then click Add
Go to Options, double-click Boot Order and modify it to boot from scisi0/the disk we just loaded.
Make sure to remember the MAC addresses for net0 and net1 listed in hardware tab.
Essentially, we want to make sure that net1/vmbr2/whonix network has 10.152.152.10 IP.
net0/vmbr0/normal network needs to be configured w/ static IP.
Start the VM and go to the console.
Login with user/changeme then go through all the set up steps.
When the machine is trying to connect to tor, press control+c to cancel the script and get a shell.
Edit the network configuration
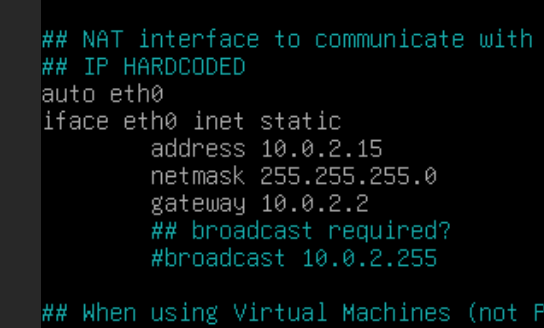
Change the default eth0 configuration to configuration that matches your network. Since Proxmox VM isn't behind NAT, it should be matching the network your proxmox machine is on.
This is default:
This is what I changed the configuration to:Reboot the VM.
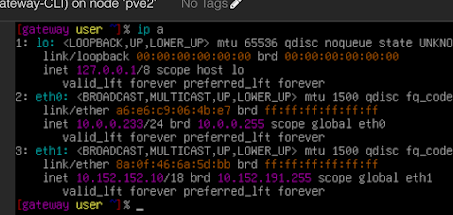
Login and run "ip a" command to ensure that Whonix network has 10.152.152.10 IP and eth0 has an actual IP for your normal network. Check the MAC address to make sure it matches the hardware you have attached.
Run "sudo systemcheck" to make sure you're connected to tor.
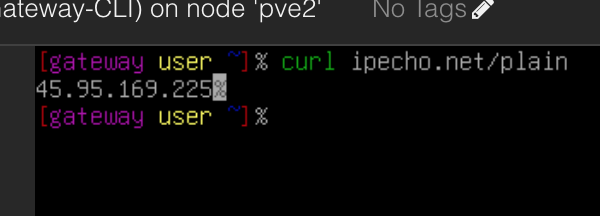
Check your IP and make sure it's not your IP.
Reboot the VM.
Attaching a VM or Container
I'm attaching a container to the whonix network but you pretty much do the same with VM but static IP assignment needs to be done inside the VM rather than proxmox webui. Check whonix docs and links below.
I have created an Ubuntu container with the following network settings
Check IP
Links
https://www.whonix.org/wiki/VirtualBox#CLI
https://www.whonix.org/wiki/Documentation
https://www.whonix.org/wiki/Other_Operating_Systems
https://malware.news/t/setting-up-whonix-gateway-in-vmware-workstation/61279


